
Roof Vent & Pipe Boot Leaks: Repair Guide
Ask any roof leak specialist what causes the most leaks they fix, and the answer is almost never the shingles or panels. It’s the holes. Every pipe, vent, and chimney punched through a roof is a potential leak, and roof vent leak repair is the single most common service call in residential roofing — including here in Carol Stream.
If you’ve worked through how to find a roof leak and your stain sits near a bathroom, kitchen, or laundry area (where vent pipes run), or under a ridge or turbine vent, there’s a strong chance the vent flashing is your culprit. This guide covers the failure points, what repairs look like, and what you should expect to pay.
The #1 Cause: Cracked Pipe Boot Collars
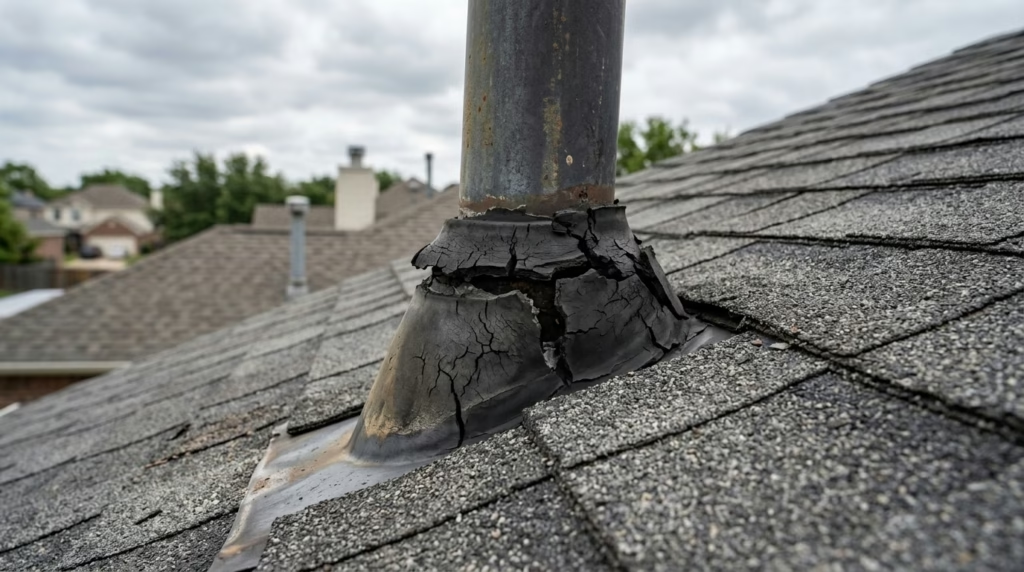
A pipe boot is the flashing that seals a plumbing vent pipe where it exits the roof — typically a metal base flange with a rubber (neoprene or EPDM) collar that grips the pipe. That rubber collar is the weak link. UV exposure and Illinois freeze-thaw cycles dry it out and crack it, usually within 10–15 years — long before the roof itself wears out.
A cracked collar lets water run straight down the pipe and into the attic, often dripping along the pipe itself. Telltale signs:
- A ceiling stain directly under or near a bathroom/kitchen
- Water dripping along the vent pipe in the attic
- Visible splits, cracks, or gaps in the rubber collar when viewed from the roof
- The collar has pulled away from the pipe, leaving a visible gap
The fix: Replace the entire boot. This means removing the shingles around the pipe, sliding the old boot out, installing a new boot with the flange properly layered under the uphill shingles and over the downhill ones, and re-shingling. The whole job typically takes under two hours. Some techs sell “collar-only” slip repairs — a new rubber collar slipped over the old one — which work as a stopgap but don’t last as long as a full boot replacement.
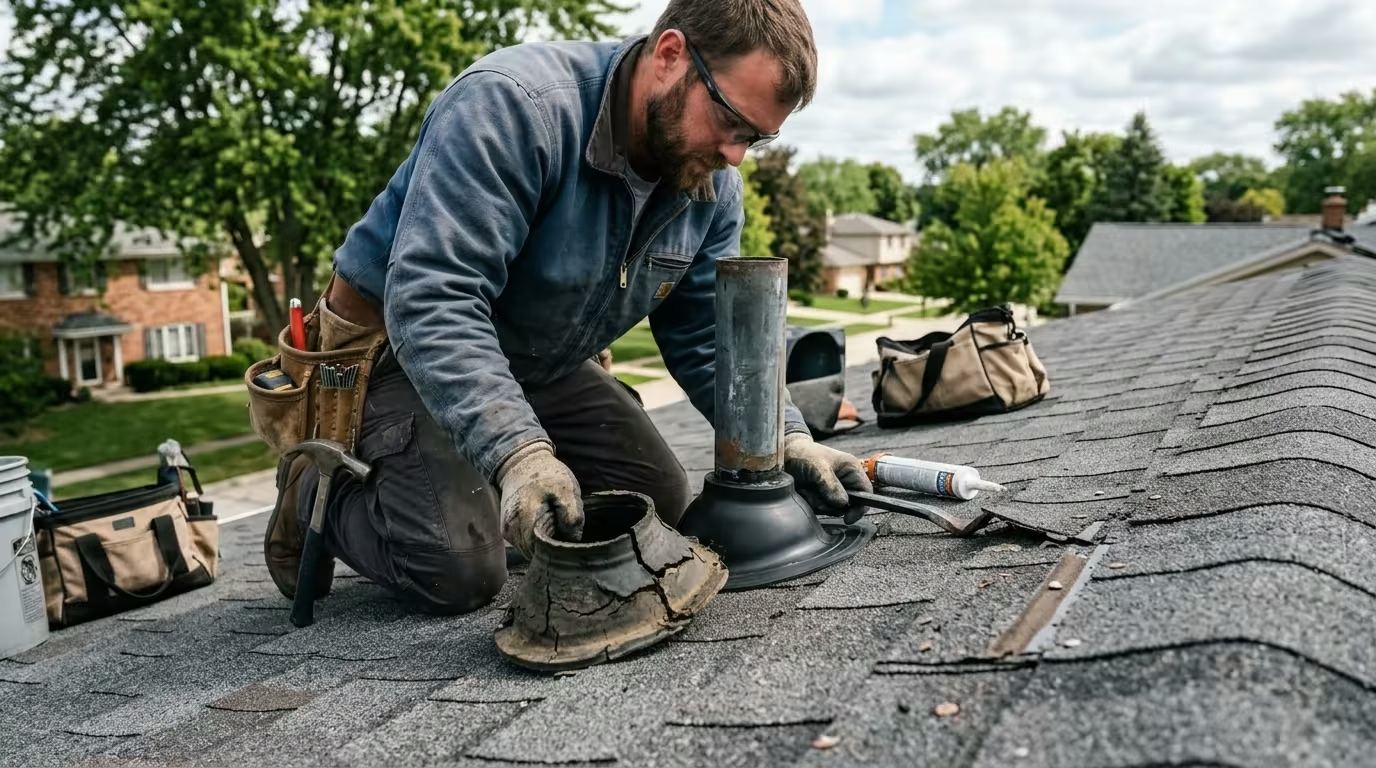
Pro tip for longevity: Ask for a boot with a silicone or lead collar instead of basic neoprene. Silicone collars resist UV far longer, and lead boots (the collar is soft lead that molds to the pipe) can outlast the roof itself. The upgrade cost is modest — usually $25–$75 more in materials.
Other Vent Leak Sources
Exhaust Vent Flashing (Bathroom/Kitchen/Laundry)
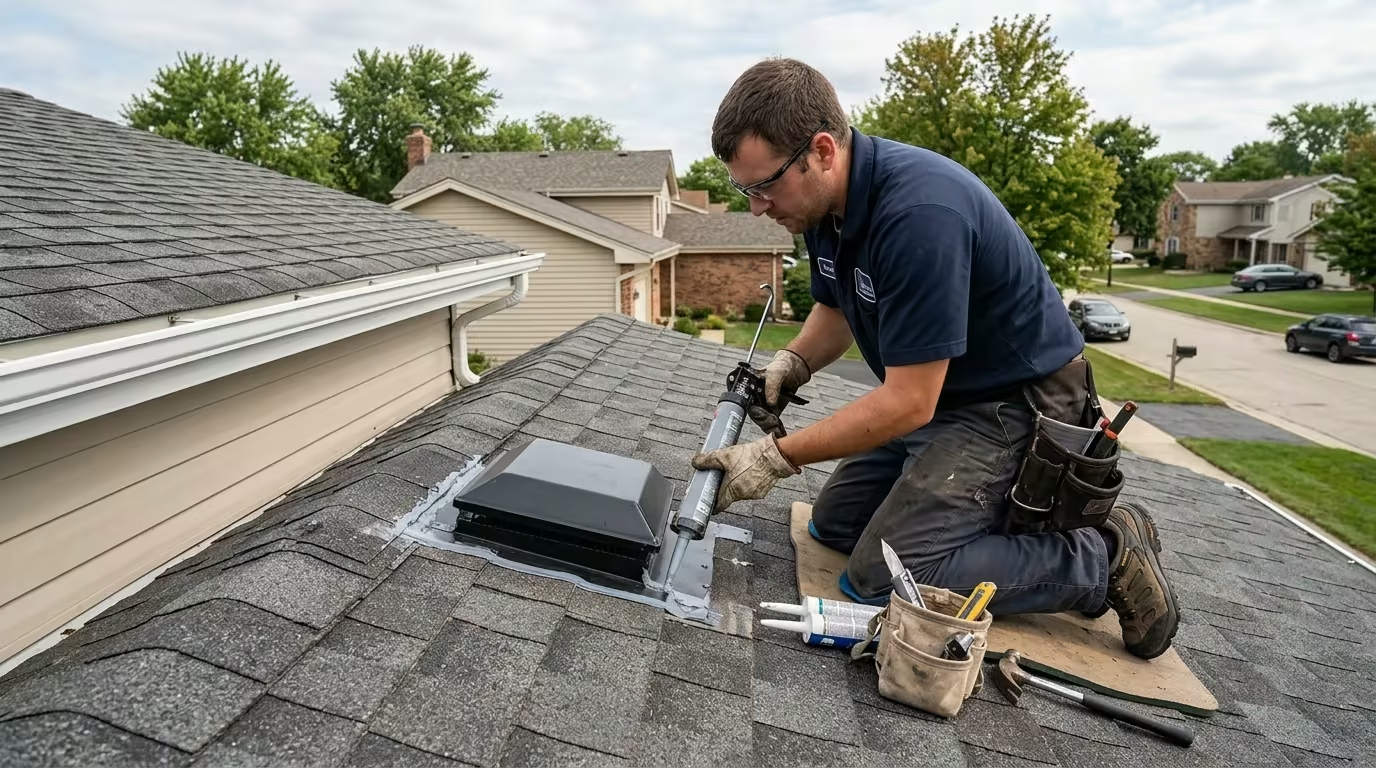
These vents terminate in a louvered or hooded cap with a flashing base. Failures include:
- Failed sealant around the flashing base — the most common issue
- Improper integration with shingles (flashing laid on top instead of woven in)
- Damaged or missing caps letting wind-driven rain in directly
- Disconnected ducts in the attic — moist air dumping into the attic looks like a leak but is actually condensation. If the “leak” appears in cold weather with no rain, suspect this first.
Ridge Vents
Ridge vents run along the roof peak. They’re excellent ventilation — when installed correctly. Problems arise from:
- Ridge vents installed without proper end caps or weather filters
- Wind-driven rain entering in severe storms (a sign of a missing or damaged baffle)
- Nail or staple blow-throughs during installation
Ridge vent leaks are tricky to diagnose because the water can travel along the ridge before dripping. A specialist will hose-test sections to isolate it.
Turbine and Box Vents (Attic Vents)
Older static vents (turbines, box vents, gable vents) develop leaks at their bases:
- Turbine vents seize up with age; a frozen turbine with a failed base seal leaks
- Box vents crack at the flange or lose their sealant bed
- All of these are candidates for replacement with a ridge vent system during a re-roof, but individual replacement is the standard repair
Chimney Counter-Flashing
Chimneys aren’t vents, but they fail at the same principle point — the transition. Counter-flashing (the metal embedded in the mortar joints that overlaps the base flashing) pulls away as mortar deteriorates. Illinois winters are brutal on mortar joints. Signs: stains on the ceiling near the fireplace, dampness on the chimney breast in the attic, or visible gaps between the flashing and brick.
Repair ranges from re-sealing (short-term) to cutting new reglets and installing fresh counter-flashing (the right fix, and worth it).
Roof Vent Leak Repair: What the Job Looks Like
For a standard pipe boot replacement, expect this sequence:
- Attic check. The tech confirms the drip path and checks for secondary damage (wet insulation, deck staining) that also needs attention.
- Shingle removal. The shingles around the vent come up — usually 2–4 courses — and get set aside for reuse if they’re in good shape.
- Old flashing out. The failed boot or vent flashing is removed; the deck is inspected for rot.
- New flashing in. The new boot goes on with proper shingle-layering: flange under the uphill shingles, over the downhill shingles, fastened with roofing nails in the flange (never through the water-shedding surface).
- Shingles reinstalled. Original or matching shingles go back with sealant on the nail heads.
- Hose test. Water runs from above the repair to verify the seal.
The whole job typically takes 1–3 hours depending on vent type and access.
Repair Costs
| Repair | Typical cost range |
|---|---|
| Pipe boot replacement (standard) | $250 – $500 |
| Pipe boot replacement (premium silicone/lead collar) | $350 – $650 |
| Exhaust vent flashing replacement | $300 – $550 |
| Turbine vent replacement | $400 – $700 |
| Ridge vent section repair | $500 – $1,000 |
| Chimney counter-flashing rebuild | $750 – $1,500 |
| Multiple boot replacements (same visit) | $200 – $400 each additional |
If a tech is already on your roof for one boot, having every boot replaced at the same time is smart economics — the marginal cost is low, and boots of the same age tend to fail in the same timeframe. This is also the right moment to ask about preventing future roof leaks, since a vent-focused maintenance check pairs naturally with the seasonal routine.
DIY vs. Pro
DIY-able (with care): Re-sealing an exhaust vent base with proper roofing sealant is within reach of a handy homeowner on a low-slope roof. So is a temporary collar patch using a split rubber collar and hose clamps — it won’t win beauty contests, but it stops the drip until a pro visit.
Call a pro when: The repair requires removing shingles (most boot replacements), the roof is steep or two stories, the vent is a chimney (counter-flashing work), or there are multiple suspect vents. Mis-layered flashing is worse than the original problem — it’s the #1 cause of “repaired” vents leaking again.
How to Tell a Vent Leak from Other Leaks
Quick diagnostic shortcuts:
- Stain under a bathroom/kitchen/laundry? → suspect a pipe boot first.
- Leak only in heavy wind-driven rain? → suspect vent cap or ridge vent baffles.
- Drip runs along a pipe in the attic? → it’s the boot, almost certainly.
- Dampness near the chimney breast? → counter-flashing.
- Stain with no vent nearby? → look at asphalt shingle roof leak repair or signs of a roof leak inside your home to broaden the search.
And remember: if the “leak” is actually condensation from a disconnected bath fan duct, no amount of roof repair will fix it — the duct needs reconnecting and insulating. A good tech checks this before quoting roof work.
FAQ
How long do pipe boots last?
Standard neoprene/rubber boots last 10–15 years in Illinois weather; the UV and freeze-thaw cycles are hard on rubber. Silicone boots last 20+ years, and lead boots can last the life of the roof. If your roof is 12+ years old and the boots are original, assume they’re on borrowed time.
Can I just caulk around a leaking pipe boot?
As a temporary measure, yes — a bead of polyurethane sealant around a cracked collar can buy you a season. But caulk on a moving rubber collar is a band-aid; the collar keeps cracking underneath. Budget for a full boot replacement within the year.
Why does my roof vent leak only in winter?
Two possibilities: (1) ice dams are forcing water uphill and under the vent flashing — see our Illinois ice dam roof leak guide; (2) it’s not a leak at all, but condensation from warm moist air hitting cold vent surfaces or a disconnected exhaust duct. Winter-only symptoms with no rain point strongly to condensation.
Should I replace all my pipe boots at once?
If one boot has failed from age and the others are the same age, yes — the labor to get on the roof and set up is the same, and the additional boots cost a fraction of a second visit. Most homeowners in this situation do all of them.
Do turbine vents leak more than ridge vents?
Turbo-style vents have more failure points (moving parts, larger base penetrations), and seized turbines with degraded seals are a classic leak source on older homes. Ridge vents distribute ventilation along the peak with fewer penetrations. When a turbine needs replacement, many homeowners upgrade to a ridge vent — though that requires cutting the ridge slot, so it’s usually done as part of a larger project.
Further Reading
- Family Handyman: 12 Tips for Finding and Fixing Roof Leaks — practical leak-detection tips for homeowners
- This Old House: How to Find and Fix a Roof Leak — step-by-step leak-finding and repair walkthrough from a trusted home-improvement source
External links open in a new tab and are provided for reference; we are not affiliated with these publishers.
Roof leaking in Carol Stream? Get help fast.
Call Carol Stream Leak & Restoration at (630) 866-1445 — we'll connect you with a local repair professional serving Carol Stream, Bloomingdale, Glendale Heights, Wheaton, Hanover Park, Bartlett, and West Chicago.
Carol Stream Leak & Restoration is a local referral service that connects homeowners with independent local repair professionals; it is not a roofing contractor.